Modern smartphones make it easy to take 3D pictures using multiple cameras or the time of flight sensor if available.
The 3D pictures are regular pictures with additional data establishing the distance between the camera and the objects.
Note: If you only want to take 3d pictures and share them on social media, check sections 2 and 4.
1. What is the depth map?
The depth map is the data embedded in your image that contains the data of the time of flight sensor. The depth map is usually a lower resolution image where each pixel is a value that represents the distance between the camera and the object.
1.1 What is a time of flight sensor or camera?
A time of flight sensor is a device that calculates the distance from the object to the lenses by measuring the time it takes light to travel from one to the other. Modern smartphones have a LIDAR sensor.
2. How do I take a picture with a depth map with my iPhone?
The iPhone Camera app takes photos with the depth map using the Portrait photo.
The portrait mode uses the time of flight sensor to enhance the edit capabilities with additional filters, like blurring the background or changing the lighting, thanks to knowing the 3d composition of the scene from the depth map.
What we aim here is to take that picture with the original app for later extract the depth of map data for other purposes.
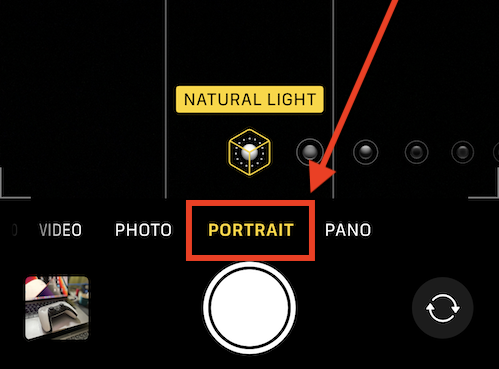
- Open your camera
- Select Portrait mode
- Take the picture
3. How do I extract the depth map?
Export the image from your photos and use the hief-convert tool. Which is part of the ImageMagick toolset.
Install ImageMagick from your console with: brew install imagemagick
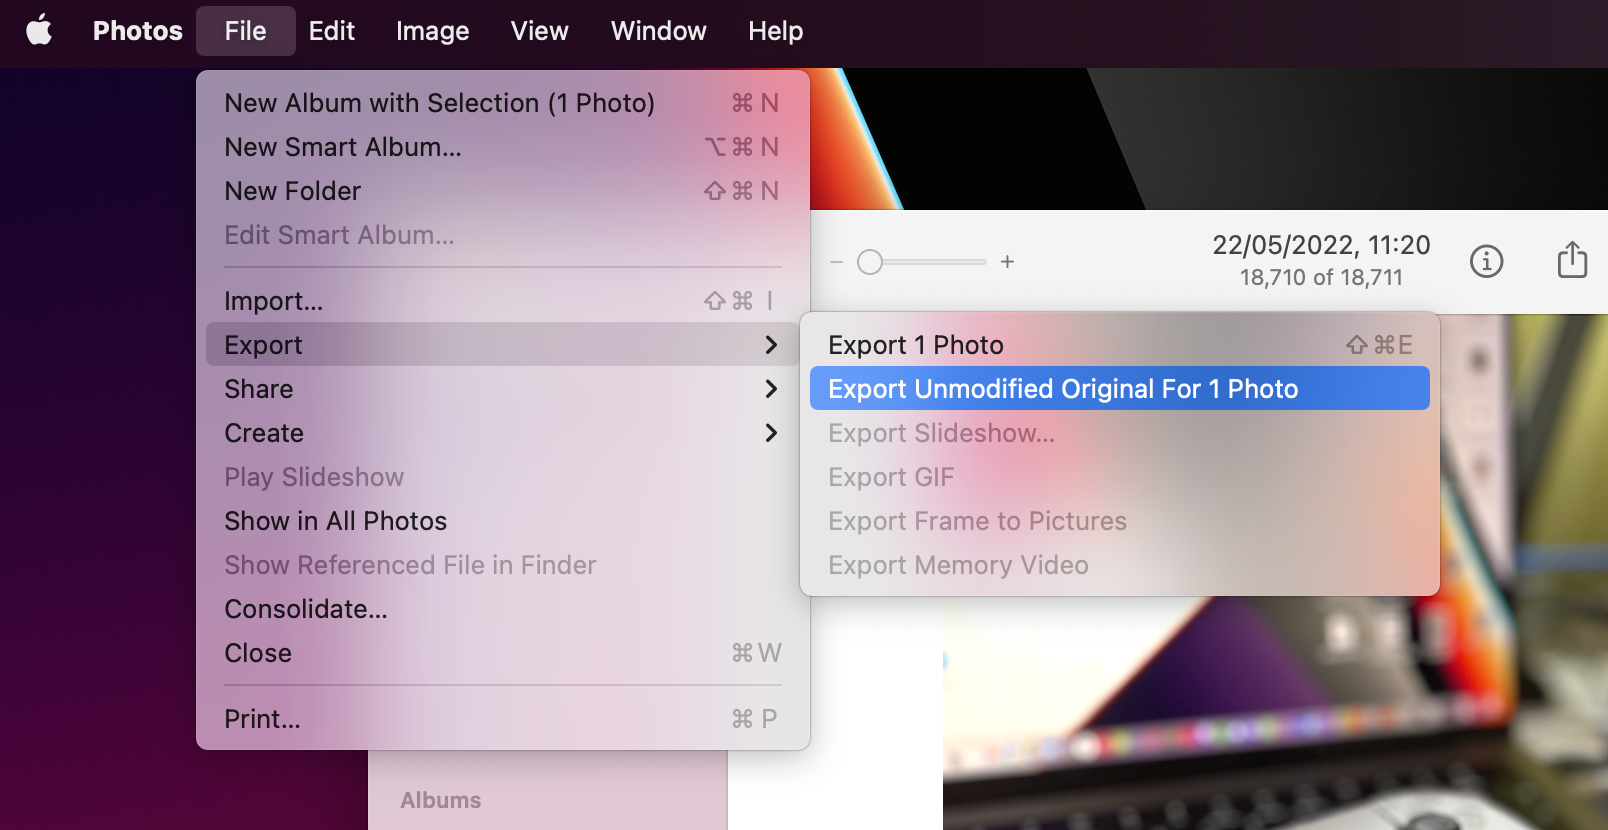
1. Open photos
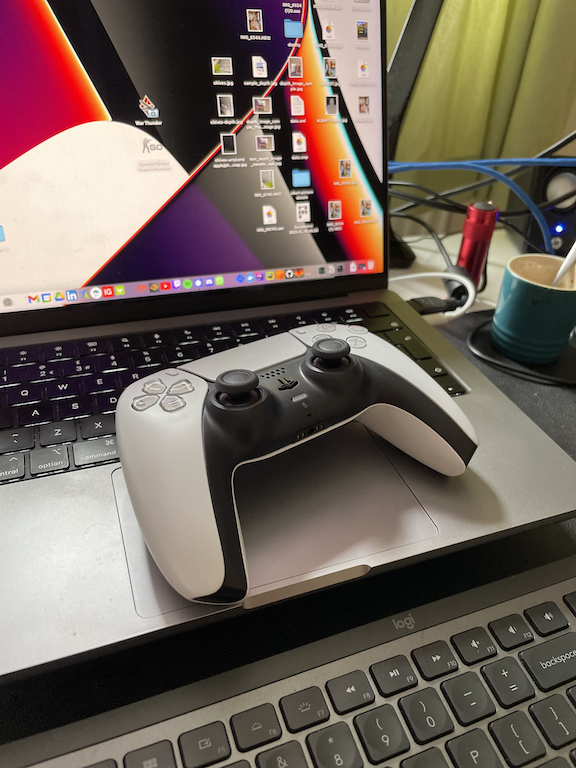
2. Choose the photo you are interested in and make sure it is a portrait

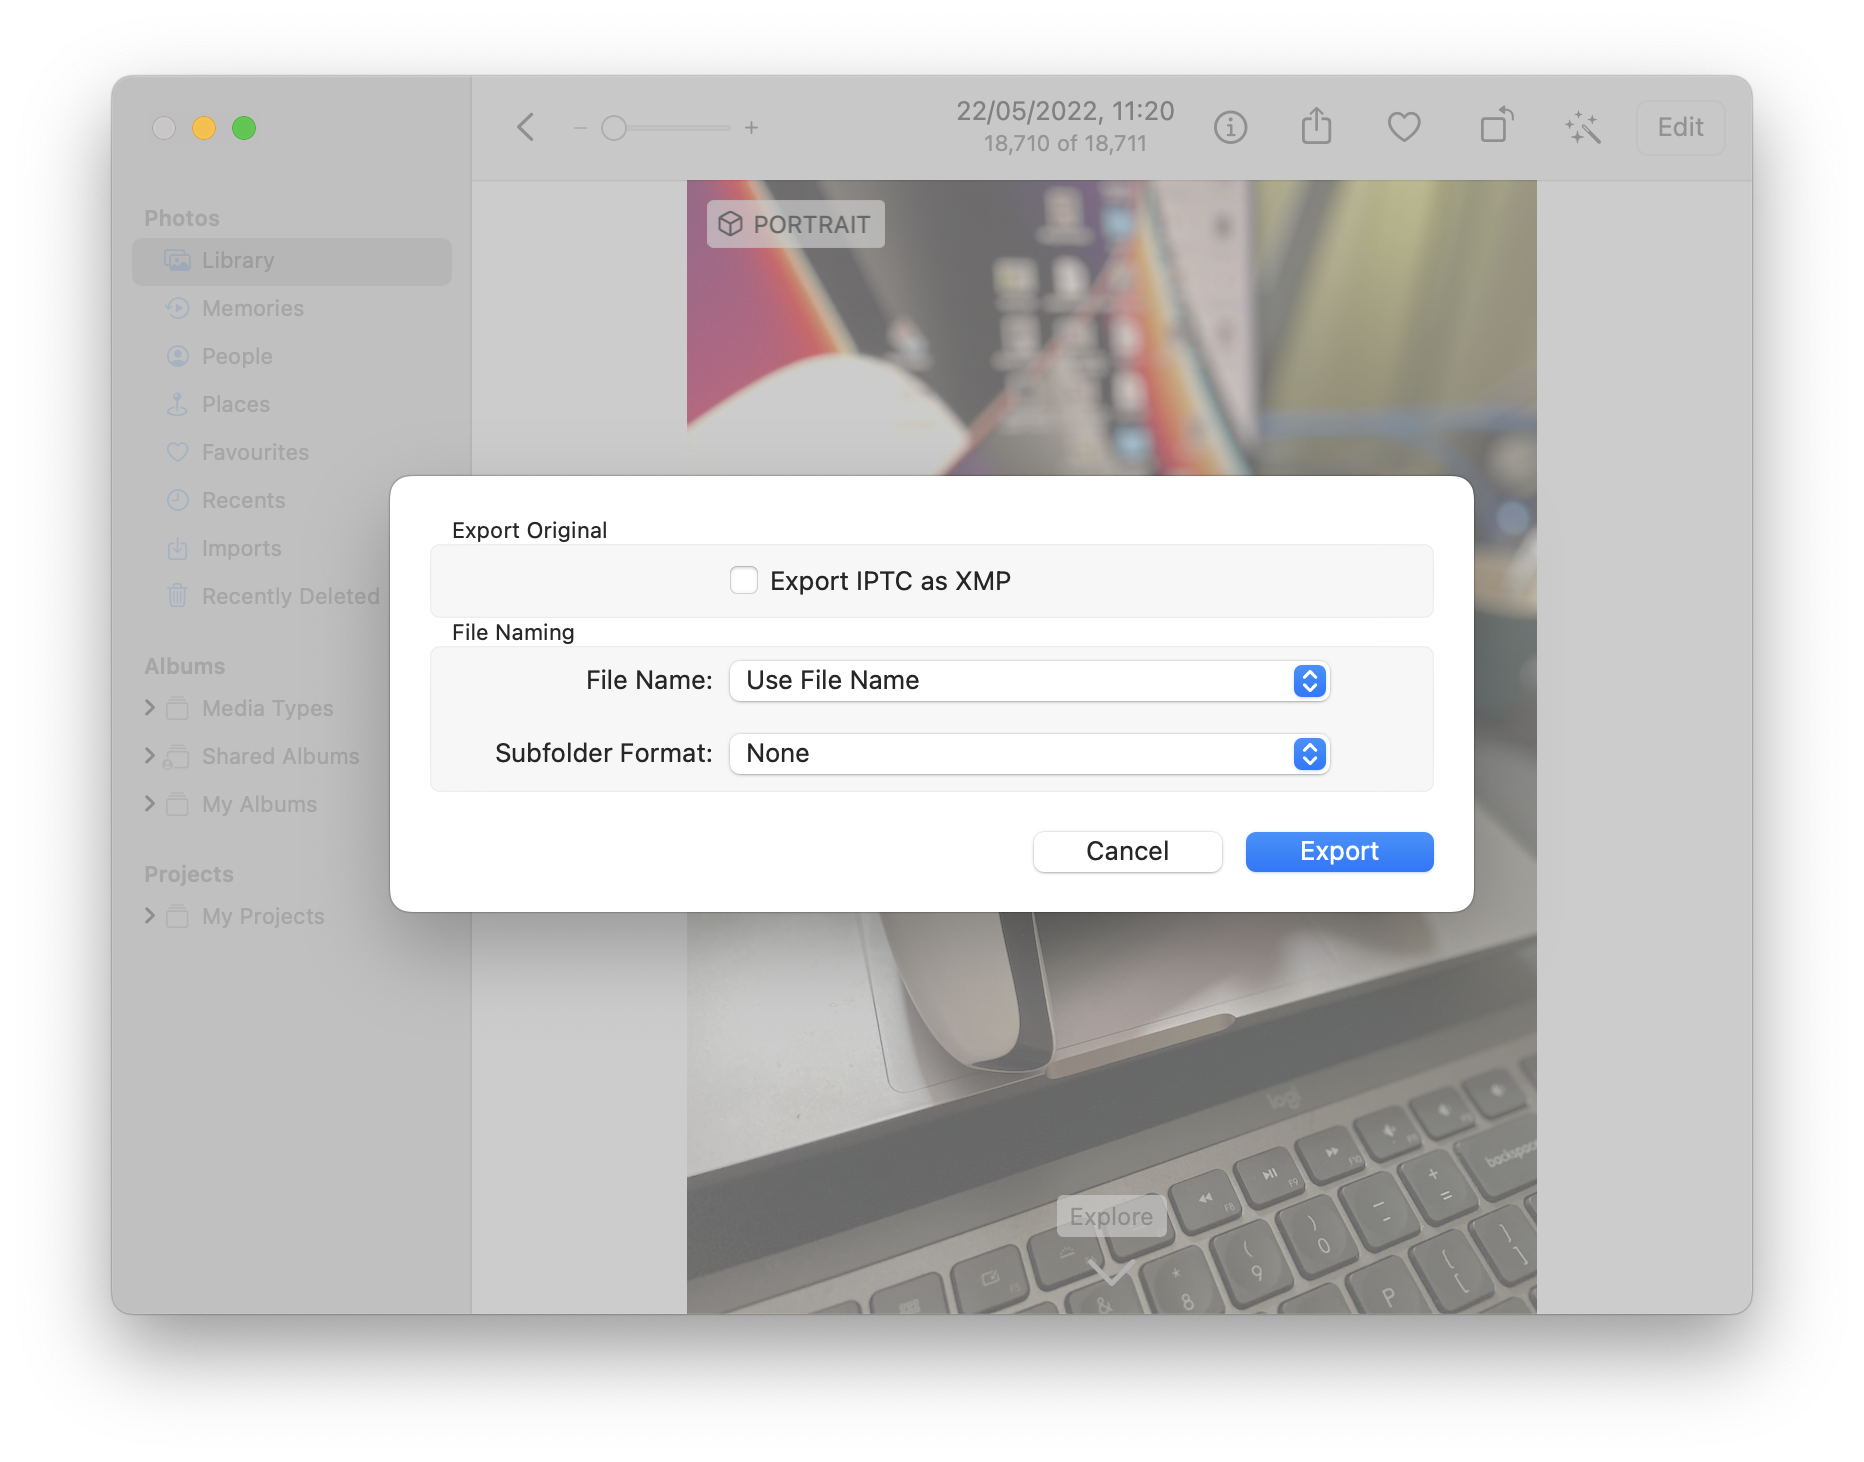
3. Export the original photo. From the menu: File -> Export -> Export Unmodified Original For 1 Photo

5. Open your terminal, go to the Pictures folder and search for the HEIC picture you exported.
asola@tardix ~ % cd Pictures
asola@tardix Pictures % ls -l *.HEIC
-rw-------@ 1 asola  staff  2151611 22 May 11:41 IMG_6748.HEIC
6. Use heif-convert to convert the HEIC image into jpg
asola@tardix Pictures % heif-convert IMG_6748.HEIC gamepad.jpg
File contains 1 images
Written to gamepad.jpg
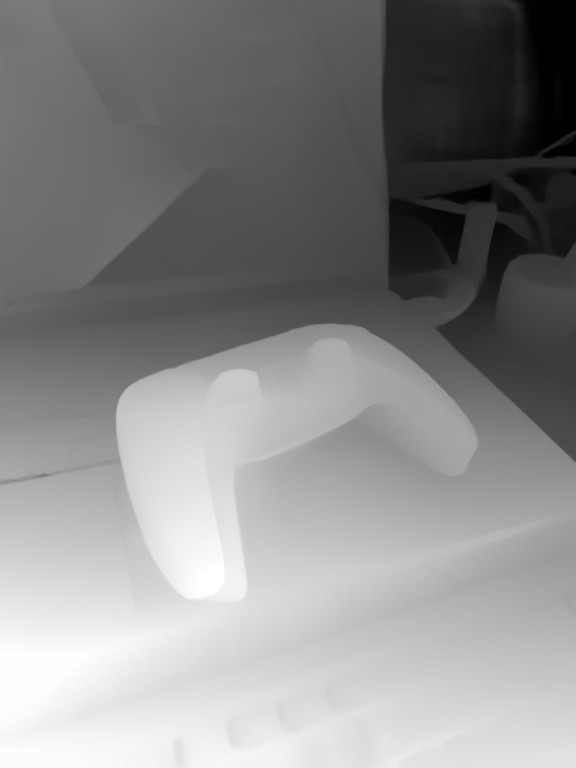
Depth image written to gamepad-depth.jpg
Auxiliary image written to gamepad-urn:com:apple:photo:2020:aux:hdrgainmap.jpg
asola@tardix Pictures % open gamepad-depth.jpg
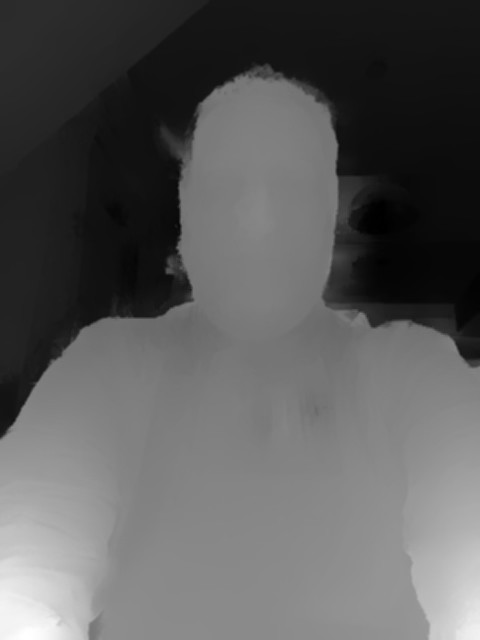
3.1 Extracted depth maps images from the iPhone
So far Facebook already recognises the HEIC image maps.
4. How can I use the depth map?
5. Which other tools do you know for the depth maps?
Leave it in the comments, please.
Hey Albert, I installed libheif via homebrew on macOS instead of imagemagick. I also needed a flag (–with-aux) to extract the depth image with heir-convert:
heir-convert –with-aux
Thanks Tim – this flag was what I needed to get heif-convert to work – as the approach in the article wasn’t working (it just output a basic colour jpeg without depth information).
It’s also worth noting that in Sonoma, you can use Image Capture app to download specific images from an iPhone connected by USB, if you’re not in the habit of syncing to Photos on your Mac (I don’t).